![]()
![]()
![]()
![]()
![]()
![]()
![]()
![]()
![]()
![]()
![]()
![]()
![]()
![]()
![]()
![]()
![]()
![]()
![]()
|
|
|
|
As I'm sure my friends and family will corroborate, I am a firm believer in the premise that form follows function, particularly in most things automotive, so I'm not inclined to make styling changes to the car's exterior merely to alter its appearance. Although there's always the possibility that I might eventually get around to such frivolity, it isn't very likely because it isn't my nature. At present, with the minor exception of the side scoops, each of the few exterior modifications I've made to the Cobra was motivated by something other than the sole desire for a "different look," and the reasoning behind the selection and installation of each is detailed in its section below. After installing Taz's Roush tool box, I realized that it didn't fit neatly into any of my pre-defined categories, so I had no web page to accommodate it. To remedy the situation, I decided to rename this page from Body and Trim to Body/Trim/Misc , so that I would have a page for upgrades that didn't fit elsewhere. You'll now find all such odds and ends here.
ABS Fender Flares
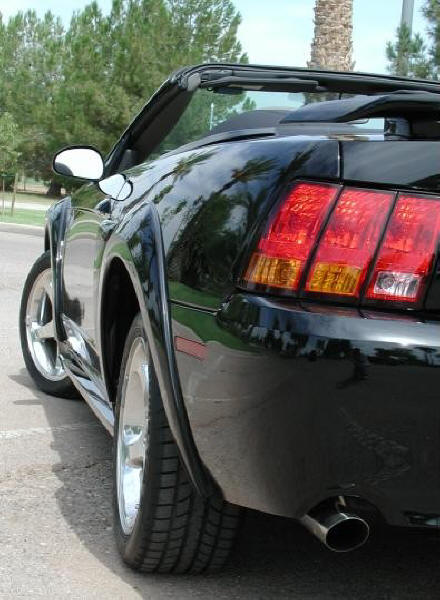
Taz was only about a month old when my girlfriend, Hillie, dinged one of his sheet metal fender flares with the rear door of her car - in my own garage, no less! Even worse, I could see by just studying the car's styling that this sort of thing was going to become a common occurrence unless I took steps to avoid future incidents. At the time of the door ding incident, I had already begun looking into ways to minimize the rocker panel chips caused by all the small, jagged rocks (typically bits of quartz and granite) that commonly litter many of our desert streets and roads. Like many folks in this area, I had used mud flaps in the past to protect the rockers, but I resisted the notion of sticking them on the Cobra, because mud flaps just don't do anything positive for the image of a performance car. Friends had told me in the past that plastic aftermarket fender flares really worked well in protecting the rocker panels. I had never completely believed them, but since I was now looking for something to protect the sheet metal fender flares as well as minimize the rocker panel paint chips, why not try a single solution for both? Ever tried to locate aftermarket fender flares for a New Edge Mustang? Not an easy assignment back then, and impossible today. After a lot of poking around on the Internet, I located an Aussie company, EGR, which produces a lot of both OEM and aftermarket parts for Ford of Australia. As it turns out, one of the company's aftermarket products was a set of ABS fender flares for these cars (not too surprising, considering many of the Aussie "outback" areas are very similar to our southwest desserts). After a little more digging, I discovered a stateside vendor for the EGR flares and ordered a set for Taz. Before installing them, I had my local body and paint shop, DependableAuto Body East, prep and paint the flares to match the car. As I expected, the cost of the paint work was higher than the purchase price for the parts themselves, but good paint work isn't cheap, and Dependable does great work. Since they're now paint-matched to the car, and they follow the sheet metal lines well, you need to look fairly closely to really see them, and they do fulfill their missions - in both departments. The shot below was taken shortly after I installed the flares, but after more than a decade, Taz still has no chips in his rocker panel paint and, of course, no additional unsightly dings in his wheel arches.
As you can see in the photo above, the one downside to the flares was that they further emphasized the "tucked in" appearance of the rear wheels that plagued all stock New Edge 'Stangs. However, that was not a problem for long. Suspension adjustments and more aggressive sneakers were not far off. Those would soon mitigate the issue. NOTE 1: After several years and thousands of miles of driving on roads occasionally littered with potentially lethal debris, Taz hasn't acquired a single rock chip along his rocker panels or lower fenders. (Unfortunately I cannot say the same for the windshield.) NOTE 2: I suppose I was the only person in the entire United States who thought these ABS flares were a good idea, since they're no longer available.
Shelby-Style Side Scoops
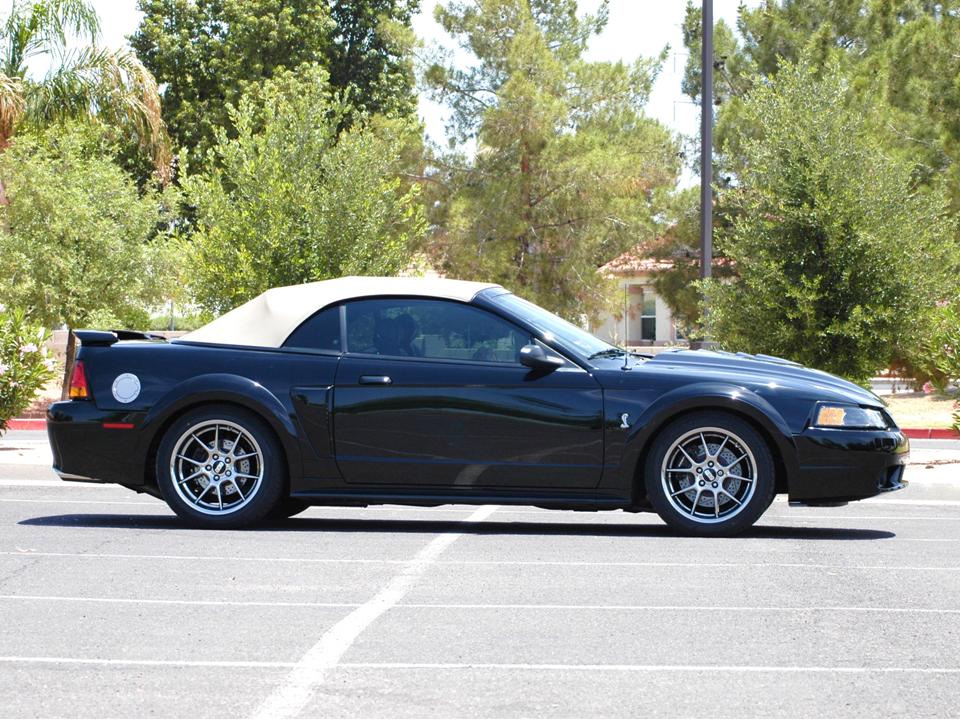
When I bought the Cobra, the one body feature that I disliked enough to quickly change for purely aesthetic reasons was the mock side scoop adorning each of the car's flanks. For '99 and '01 SVT had graced the Cobras with the base model V6 side scoops, of which I was most assuredly not a fan. I considered the Shelby-style side scoops, which Ford was at the time installing on only the Mustang GT's, to be much more befitting for a car of the Cobra's nature and mission in life, so I scored a pair of those scoops and installed them at about the same time that I added the fender flares. A couple years later, I was amused to note that SVT had also adopted the more aggressive side scoops for duty on the Terminator Cobras.
The above photo was taken in 2007, after extensive suspension changes and the installation of upgraded wheel/tire combinations. Note that by then, the tucked-in wheel/tire appearance in the rear and the car's original 4WD look had been mitigated.
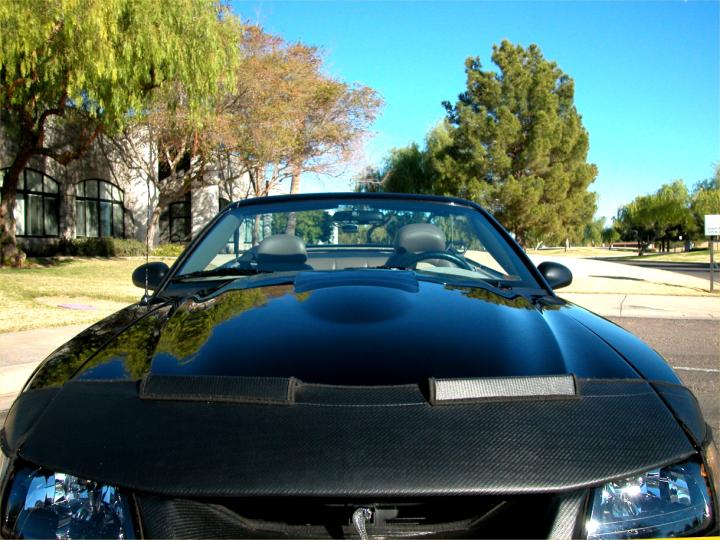
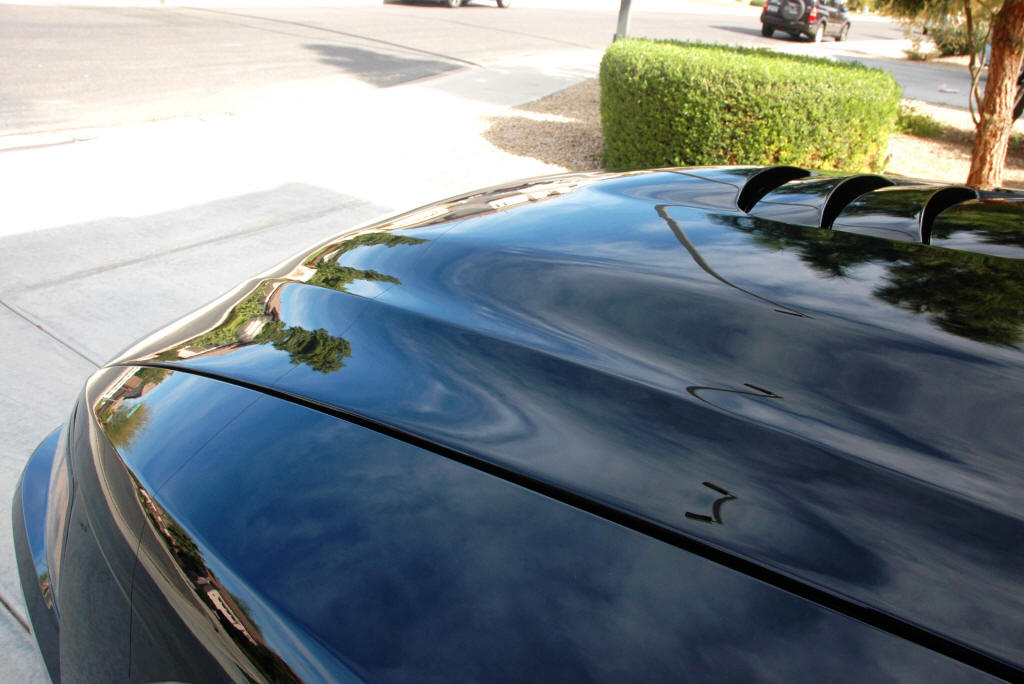
Functional Heat Extractor Hood
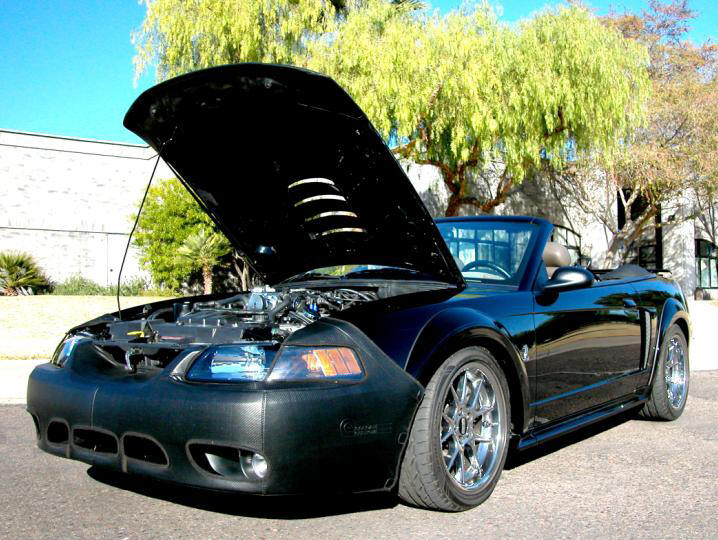
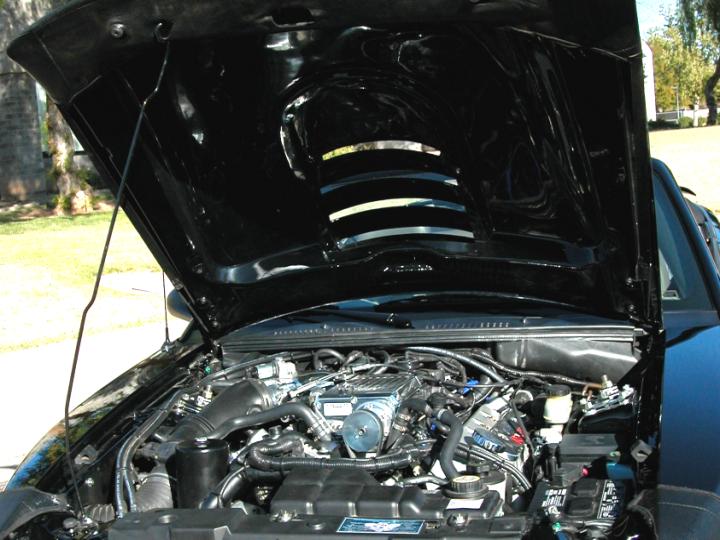
In 2003, I became concerned that installing a supercharger on the Cobra would reveal cooling system inadequacies. Even N/A, the car's engine bay typically reached outrageous summertime temperatures, and I had read about even the factory-supercharged Terminator Cobras experiencing engine cooling issues, despite their supposedly stouter cooling systems. Since cooling system problems can be especially disastrous here in the desert, I began researching methods for improving Taz's engine cooling abilities as soon as I mailed off a deposit check for my Kenne Bell twin-screw kit. After looking at larger capacity radiators, electric water pumps, water-wetters (surfactants), etc, I eventually concluded that minimizing cooling issues must begin with effectively removing the super-heated air from the engine bay, so that is where I should start. I began shopping for a suitable heat extractor hood. Considering the location of the twin-screw on the motor, the ideal air path would bring cooling air in from the front clip, flow it smoothly over and around the compressor case, and exit the engine bay through the hood to carry away as much heat as possible. With apologies to those of you who own them, I am not a fan of most heat extractor hoods, and despite my "form follows function" philosophy, I suspected there had to be a more aesthetically appealing solution than most I'd seen. Conversely, while I think the Terminator Cobra factory heat extractor hood looks really great, I believe its vent openings are somewhat too far forward to effectively cool a supercharger that is mounted squarely atop the motor. The Ford Racing 2000 Cobra R hood was gracefully shaped and an excellent match for the car's styling, but unacceptable from a functional standpoint, considering the non-functional nature of its louvers. However, I discovered a knockoff hood from Niche Performance Industries (NPI for short), a small Michigan company, that possessed one very important difference. The NPI hood incorporated functional louvers into its design. This hood was available in an all-fiberglass version weighing about 35 lbs, or in a lighter version constructed with a fiberglass inner liner beneath a carbon fiber outer shell, in addition to an ultra-lightweight racing skin. To help offset at least some of the weight added by the twin-screw, I opted for one of the CF-over-fiberglass units, which tipped the scales at a mere 25 pounds (23 lbs less than the factory part). Perfect - or so I thought when I mailed off my deposit check. Over the ensuing months, it became painfully clear to me that I had made a poor choice with respect to company integrity and customer service. My hood arrived damaged, as I imagine most NPI hoods did, because it had been inadequately protected against shipping damage. When I contacted the vendor about the damage, his initial response led me to believe that he intended to handle the problem in a reputable manner. Unfortunately, my experience with NPI was entirely downhill from there. Thankfully, the wizards at my local body and paint shop, Dependable Auto Body, were able to repair the NPI part, and it did look great after it was properly repaired, prepped, and painted. But I'm here to tell you that it wasn't cheap. You could have a couple of inexpensive paint jobs done on an entire car for about the same money. (Of course you generally get what you pay for.) Editorial Comment: Nearly a year after I received my damaged hood, and long after I'd had it repaired at a my own expense, NPI finally agreed to compensate me for the additional grief and expense that the shipping damage had cost me, but only because I was negatively impacting NPI's business by avidly sharing my experience on the forums. Even then, I still received nothing until I resorted to Internet-style guerilla warfare by publishing a full expose on this site and posting links to it on several others. Based on my personal experience with NPI, I cannot recommend buying from this company. My advice to anyone who really wants a 2000 Cobra R style hood with functional louvers is that you buy the Ford Racing 00R hood and have your own body shop open up the stylized louvers on that part. That'll probably cost you a hell of a lot less in time, money, and aggravation than buying from NPI. Believe me. Knowing what I now know and having already been the NPI route, that is certainly what I would do. Thankfully, the heat extraction feature of the NPI hood does work as I had hoped. I have experienced no cooling system issues at all, despite ambient temperatures that periodically exceed 120 degrees and the additional heat load presented by the blower. Regardless of the prevailing ambient temps or traffic congestion, the airflow through hood vents is able to keep Taz's engine temps well in hand. Without any further comment, here are a few shots of the NPI heat extractor hood after it was finally installed on Taz.
NOTE: As received, this hood was equipped with a tin mesh insert in each louver slot. I considered these inserts unsightly, so I had them removed and the undersides of the louvers reinforced and gel-coated as part of the hood's prep work.
Roush Tool Box
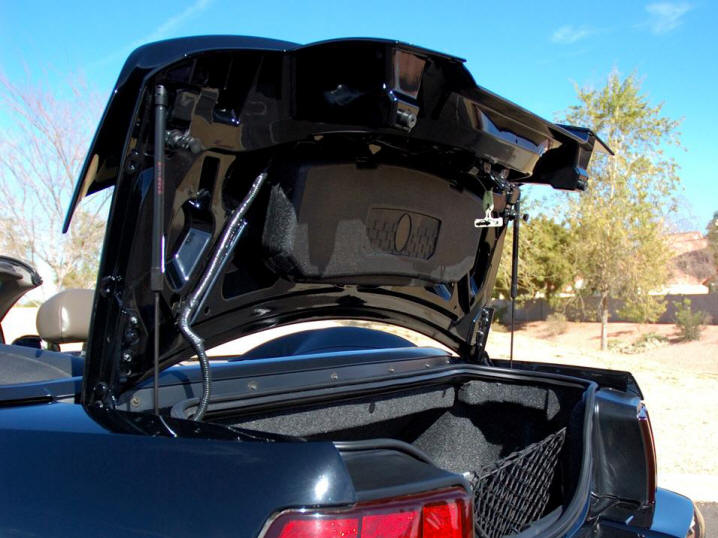
When Hillie and I first saw the Roush toolkit in the trunk of another local SVTOA member's Cobra, we both thought it made a classy, functional addition to the car. This slick little toolkit mounts to the underside of the trunk lid, ala BMW, and accommodates a small assortment of small hand tools for use in roadside emergencies. As Christmastime 2005 approached, Hillie asked me if I'd like a Roush toolkit for Taz. I said that I would like the empty tool box, so that I could populate the cutouts in its interior foam with tools of my own choosing. You see, the complete toolkit conspicuously displays the Roush logo on the face of the box and on all the tools. It even contains a commemorative Roush coin. That's all very nice for Roush owners, but it held no particular attraction for me, since I didn't own a Roush. Well, it just so happened that the folks at Roush offered the empty box, sans logo, for people like me, so Hillie ordered one of those. After the box arrived, I measured all the little cutouts, and we picked up the tools that I thought would be both most useful and require minimal additional cutting of the box's high-density foam. Here's a shot of the box after I had mounted to the underside of the trunk lid:
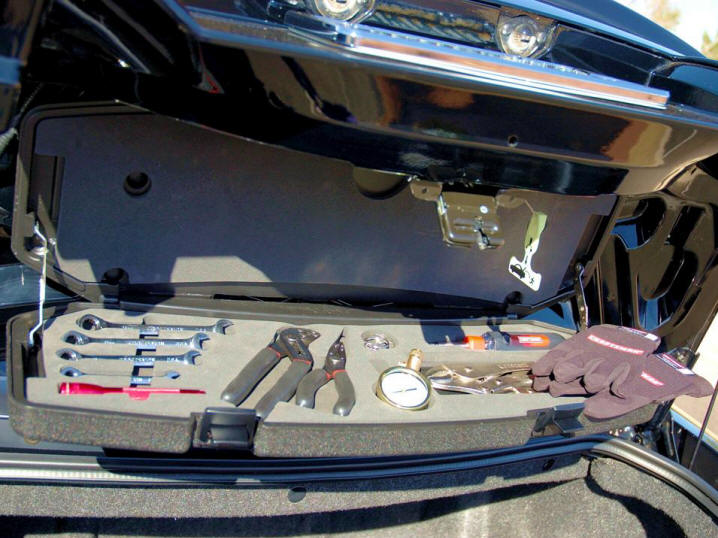
And here's a close-up of the box's contents.
Obviously, this little toolkit doesn't equip me to perform major surgery, but I've populated the box with what I consider a good selection of useful roadside repair tools, including a multi-tip screwdriver, large and small vise grips, channel locks, long-nose pliers/side cutters, a small flashlight, and four ratcheting combination wrenches in common sizes. I also added a pair of mechanic's gloves and a decent tire pressure gauge - oh, and a pewter cobra snake key fob (since I couldn't think of anything else to occupy the little cutout where the Roush coin usually resides). Did you notice the large blank oval on the face of the box in the first photo above? A Roush logo badge occupies that spot when you buy the full toolkit version. I later installed a pewter coiled cobra on my own box to fill the void, so it now looks like this:
Vanity Plates
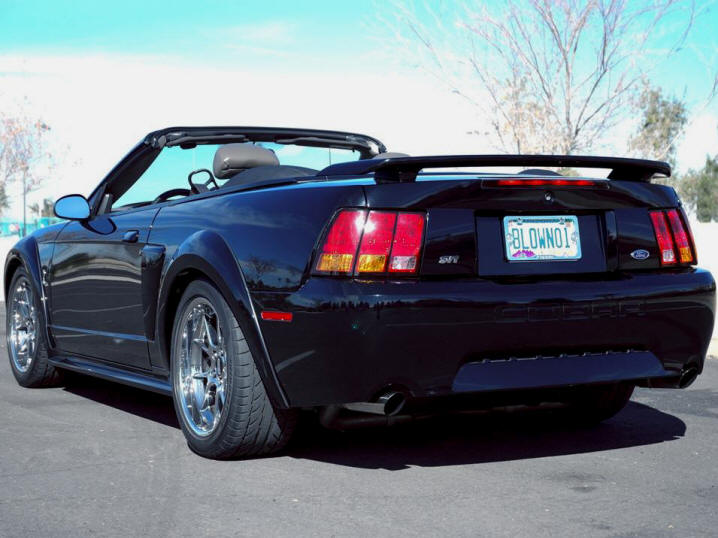
For a long time, I resisted the proposition of vanity plates for the Cobra. I didn't want to provide the local LEO's with an easy way to remember my car. Eventually, however, Taz's progressively unique appearance rendered my objection moot. I figured that the local cops would need to be blind to not recognize my Cobra whenever they saw it, so what was the point of clinging to an anonymous plate? Okay, at the top of this page I made a big deal of being disinclined to make frivolous cosmetic changes. Now, just look at what I went and did. I'm sorry. The devil made me do it. Actually, my buddy Jim made me do it. He got a vanity plate for his Cobra first, and it really gave him a nice little edge at the cruise-ins that we both frequented. Anyway, after seeing his plate, I decided to look into one for myself, and I settled on some text that described the car perfectly without being offensive. Unless you're dirty minded, that is.
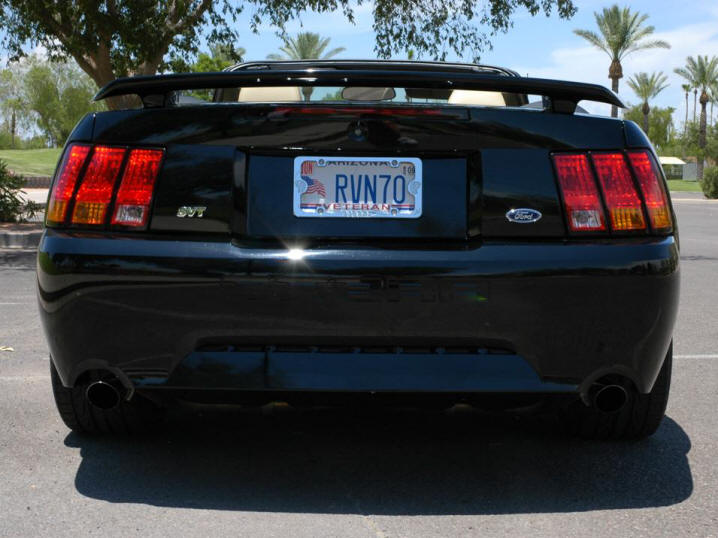
Unfortunately, the vanity plate depicted above eventually had to go away. It turned out to be much more of a cop magnet than I had anticipated. The Traffic Enforcement types were dogging me all the time and the tickets and legal fees were eating into my mad money. After considerable deliberation, I decided to replace the ticket-getter plate with a veteran's plate. After all, everybody wants to give a vet a break, right? So far, so good. The plate below has now been on the car for a number of years, and I've yet to snag a citation since its installation.
By the way, RVN isn't short for "RAVEN" as many suppose, due to the car's black color. No, I chose this plate's text as shorthand for "Republic of Viet Nam, 1970." Yes, I'm that old!
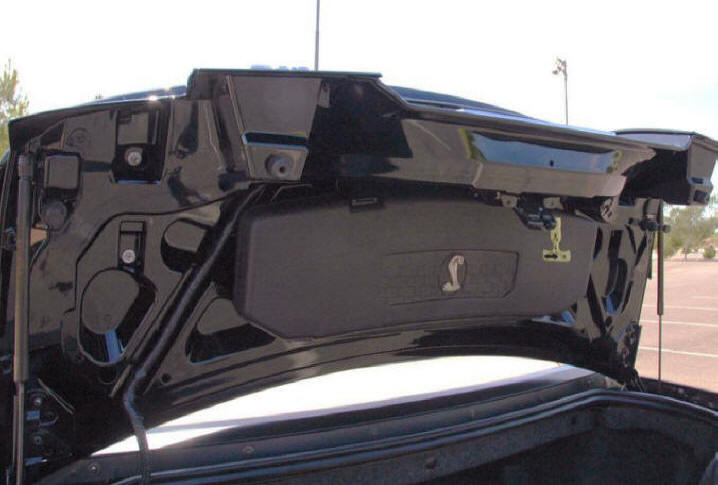
Hood Struts
Propping one's hood open with a metal bar is a procedure that belongs strictly in the "econobox" and truck worlds. Vehicles with more upscale aspirations have traditionally been equipped with springs or pneumatic struts, rather than prop rods, and I'm amazed that Ford's bean counters were able to convince management that Mustangs in general, and Cobras in particular, should get along with rods. Nevertheless, that was the situation. Fortunately, MRT Performance offered an excellent solution, and an MRT strut kit now supports Taz's hood when it's open. Below, you can see a close-up of the left strut after its installation.
I've been very pleased with the MRT struts. There are other brands of hood struts out there, but these require no drilling, and their attachment points are far enough back to keep them out of my way when I'm working in the engine bay. Both were important considerations for me.
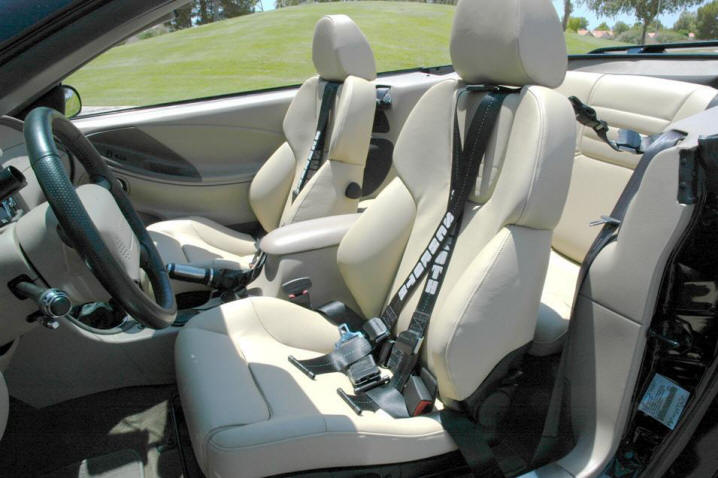
Recaro Seats & Schroth Harnesses
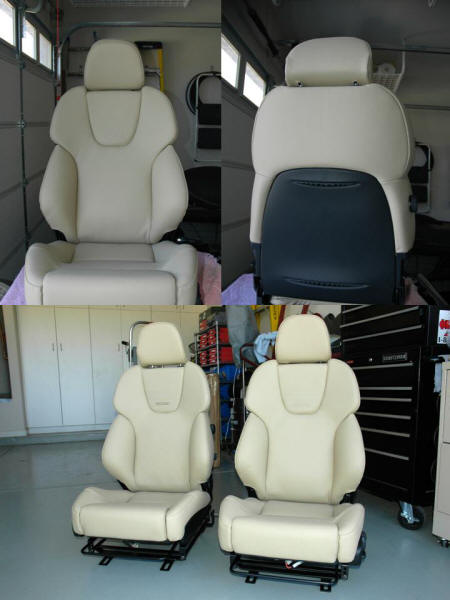
The Cobra’s OEM front passenger seat was completely unsupportive in the lower back area and woefully lacking with respect to adjustability. These shortcomings made it a singularly inhospitable place to be during extended drives, or so I’ve been told. By comparison, the factory driver seat was considerably better, offering adjustable lumbar support in addition to power height and tilt adjustments, features that made it a reasonably comfortable place to be while cruising along at legal speeds on most public roads. However, even the left chair wasn't very well suited for hot-footing it through back road twisties, much less for road course or autocross duty. Whenever flogging the car at or near the limit in those venues, I always found myself hanging onto the steering wheel for support, in order to keep myself positioned behind it. This significantly reduced the fun factor and inflated my lap times at the track. Of course, the unsupportive OEM seats were only part of the problem on track days, and by no means the worst part. By design, the factory belts failed miserably at keeping their occupants planted in the cabin. That’s right: by design. Being ancient enough to recall the advent of automotive seat belt systems, I can clearly remember this was not always the case. Early belts, when properly cinched, used to secure folks in place better than Velcro, and we all learned how to adjust them for maximum protection. With these thoughts in mind, I decided that I wanted both more supportive, more capable seats for the front seat occupants, and more aggressive restraints for track days, so I began browsing the various aftermarket offerings. Taz’s duties are primarily street-based, with the vast majority of his miles being accumulated on public roadways, so I certainly didn’t want fixed-back racing seats, just much more supportive touring seats. Similarly, I wanted sturdy, cinch-down harnesses for track use, but I wanted to retain the capability of using the OEM belts for leisurely cruises around town. Many believe Recaro seats to represent the pinnacle of automotive seat design and construction, and after researching all of the available aftermarket offerings, I understood why. I was sold on the brand, but which model? The “Sport” model was - well - sporty looking, but it lacked one feature that I demand in a touring seat: an adjustable headrest. I eventually settled on a pair of Recaro “Style Topline” seats in beige leather to match Taz’s interior. The Style seat model provides excellent support for track days while offering all the adjustability and comfort of a first-rate touring seat, including a bearing-mounted seat cushion to take the edge off bombed out roads. Besides having adjustable lumbar support, the Style backrest incorporates adjustable side bolsters and aggressive shoulder support. Additionally, the bottom cushion is equipped with an extendable under-thigh panel for improved comfort during long drives. The "Topline" trim level adds, among other features, heat and the Recaro Vent system to the mix, which are real bonuses for a diehard top-down devotee. NOTE: The Recaro Style model is no longer available. You can still obtain the Style XL, which is a slightly larger version of the same seat, but I doubt an XL will fit an SN-95 Mustang. You get only the chairs when you buy most aftermarket seats, and the Recaro brand is no exception. If you buy a pair of seats, you'll still need to procure the correct slider assemblies and a pair of vehicle-specific seat bases before you can install your new seats. As always, I had done my homework, so this came as no surprise to me. I ordered two sets of Recaro sliders and a pair of the appropriate model Wedge seat base/adapter kits when I ordered my seats, so I should have been good to go when the seats arrived. What's that old cliché about the best laid plans of mice and men? The upper left panel of the following composite shows one of the Recaro boxes in the sort of condition you can probably expect to receive them. The upper right panel shows one of the seats after having all the broken plastic pieces replaced. (See Seat Acquisition Odyssey below for explanation.) The bottom left of the composite shows a pair of Recaro sliders with Wedge adapter brackets installed on the seat's underside. The bottom right shows the seat's base bolted to the adapters.
Editorial Comment: Some folks will tell you that Recaro touring seats aren't worth the money they cost, and that there are other seating choices just as good out there for far less. Those people obviously wouldn't recognize quality if they tripped over it. Yes, there are many brands of aftermarket seats available. However, I seriously doubt that you could find another seat manufacturer as committed to quality, performance, and innovation as Recaro. If you're planning on aftermarket seats for your own vehicle and you want the very best, peruse the information that I have compiled into the PDF document linked below. If after reviewing that document, you still believe you can do as well elsewhere for less, then by all means, buy something else. Either way, I have no doubt you'll get what you deserve. Recaro Company History & Philosophy (PDF)
Seat Acquisition OdysseyYou’d expect to be able to find at least one brick-and-mortar Recaro dealer in any metropolitan area the size of Phoenix, wouldn’t you? At least one, right? Well, I believe there now is one, but there were none at the time I was shopping for seats. I was relegated to the Internet. After shopping various online dealers for a bit, I finally ordered my Recaros from Lufteknic, a Porsche specialist in Virginia that also happened to also be an authorized Recaro dealer back then. Their pricing was as good as any, and better than most. Besides, I figured a Porsche house would most likely treat me right. As it turns out it’s lucky for me that I chose them, because I definitely needed their help. Twice. First, the folks at Recaro could have packed their seats a little better, considering they had to travel from Germany to a stateside warehouse, from there to a dealer, and then to the consumer. When mine finally arrived at my home nearly three months after my invoice date (having been custom made to order at the company's factory), the plastic trim around their bases was all cracked and broken. I was prepared for this possibility, because it was a fairly common and well-documented issue, so I had the UPS driver wait while I opened the cartons and inspected the seats. Upon seeing the damage, he immediately grabbed a tape gun from his truck, resealed the boxes, and returned the seats to the depot as damaged. From there, they went back to Lufteknic. Luckily for me, the folks at Lufteknic are good people, and they took care of me. After they received the returned seats, they contacted Recaro, obtained new parts and replaced all the broken ones. Then, they packed the seats extra well to avoid a reoccurrence of any shipping damage and sent them out to me, again. However, this process added about a month to the time it took to get my seats. Unfortunately, while everyone was focused on the broken plastic issue, we all failed to notice that one of the seats was actually the wrong model. Although it bore a sticker with the part number of the correct model, it was, in fact, a “Trend” seat, rather than a Style. (The two models used identical bottom cushions. Only their seatbacks were different.) Naturally, I contacted Lufteknic about this, and they once again provided excellent assistance. They had me provide photos detailing the issue, and forwarded them to Recaro. Recaro remedied the problem directly by immediately sending UPS back out to pick up the incorrect seat, and then ate up an additional month putting it right. (This was probably due to the time required to manufacture a new seatback.) Bottom line: the seats I had ordered in December of 2007 were finally ready for installation in early May, 2008. The front and back of the driver seat are shown in the top half of the composite below. If you look closely at the black plastic on the back, you'll see two rows of small round holes that are part of the seat's forced-air ventilation system. The two seats, complete with their sliders and bases are shown in the bottom half of the photo.
I took one additional step during my seat acquisition odyssey. I had the Wedge bases stripped and refinished in black powdercoat. They had been delivered bearing a rattle can paint finish, with which I wasn’t especially happy, considering they would be partially visible once installed. Since I had plenty of time to improve on them while I was waiting for the seats, I spent a few extra shekels to have a local shop put a durable, good looking powdercoat finish on them. I also subsituted black socket head cap screws for their supplied zinc-coated hex head bolts to further improve the overall appearance of the assemblies.
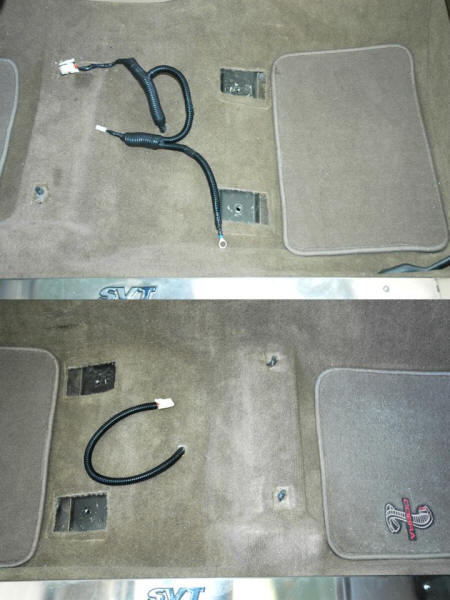
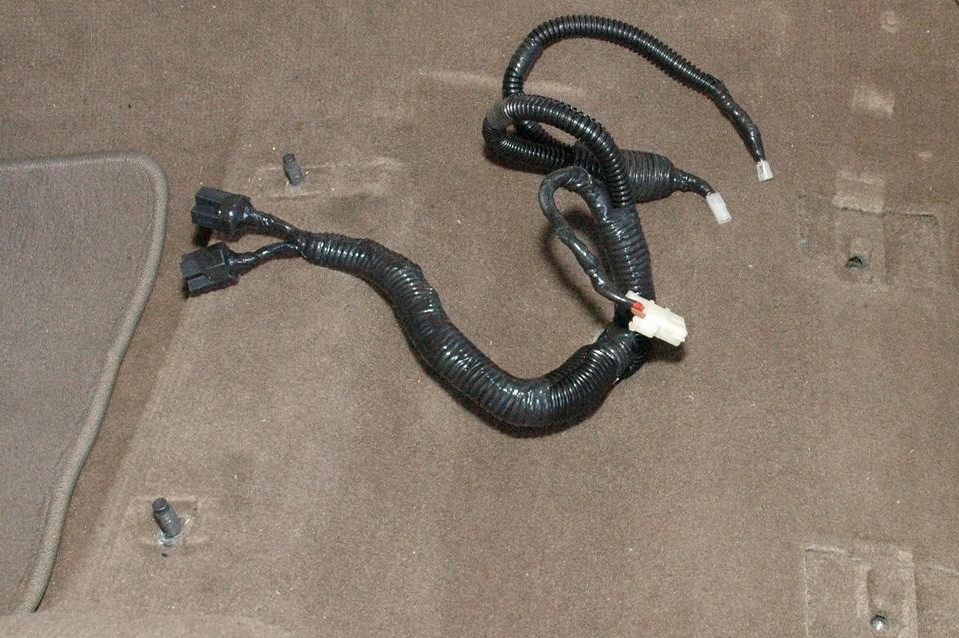
Vehicle Preparation and Seat InstallationThe Cobra’s OEM driver seat had been equipped with electric controls, but the passenger seat had been a completely manual chair. This meant that I needed to run a power circuit to the floor under the passenger seat for the new Recaro. Luckily, the OEM driver seat wiring harness contained two completely independent power feeds – a 30A circuit to power the seat positioning motors and a separate 15A feed for the lumbar air pump. Since each Recaro seat requires only a single 15A circuit, I swapped out the 30A fuse in the vehicle's seat motor circuit for a 15A fuse and used that to power the new driver seat. Then, I extended the 15A pump circuit under the console to the floor beneath the passenger seat. As usual, I installed Molex connectors at the vehicle ends of the new harnesses for plug-&-play capability. I then wrapped the harnesses with flex loom and Stretch-&-Seal silicone tape to protect the wires and provide a finished look. Piece of cake. The upper half of the composite photo below shows the driver side harness. The ring connector and small Molex plug that you see are for the OEM seatbelt warning circuit, which I retained. The lower half of the composite shows the passenger side harness, which is much simpler, since it contains no seatbelt warning circuitry.
Unlike the OEM driver seat, which was equipped with only momentary contact switches, the rockers for the vent and heat functions on the Recaros are a maintained-contact design. This difference, in conjunction with the always-hot nature of the power feed circuits feeding the seats, meant I needed to be careful to ensure the vent and heat controls were all switched off before putting the Cobra to bed. I figured that I could live with this as long as I remembered to also switch on the headlamps or parking lights whenever I used the heat/vent functions of the seats, and always checked the seat controls when switching off the lights. Selecting harnesses to perform both road course and highway duties was relatively easy. The Schroth Rallye-3 ASM was one of only a few available aftermarket harnesses that satisfied NHTSA FMVSS 209, which made it DOT-legal for use on public roads. Further, the Schroth Anti-Submarine (ASM) design offered an extra level of protection without requiring an additional anchor point and strap. The Rallye-3 harnesses are so good that they are offered as optional equipment for some European vehicles, such as BMW. They are an ideal choice for installation in any street-driven vehicle that performs occasional open track or autocross duty, because they use the factory seatbelt anchor points and can be installed in conjunction with the OEM belts. The Rallye-3 won't pass track tech at most racing venues, but it's excellent for flogging the Cobra in the open track street classes, which is where I satisfy my personal need for speed.
I also replaced both of the OEM seatbelt assemblies with fresh ones when I installed the Schroth harnesses. I had inadvertently damaged the nylon webbing of my OEM driver seatbelt during a track outing by clamping it with a small Vise Grip in a futile attempt to cinch it down tight enough to anchor me through the twisties. For safety reasons, that belt definitely needed replacement, no question about it. And since I was unsure how much the color of the OEM belts had changed over the years, I elected to replace both with new assemblies. Oh well, at least I had the presence of mind to cut the buckle off the damaged driver's belt before discarding it, so I could use it to defeat the seatbelt warning system whenever I'm wearing the Schroth harness, which is now practically all the time. Editorial Comment: I personally considered early automotive seatbelts to be outstanding restraint systems. The newer ones, not so much. So, what happened? Stupid people were breeding back then, just as they are today. That’s what happened. And all those stupid people complained that the old belts were too “confining.” (I guess I'm a little slow, but wasn’t that the objective in the first place?) Nonetheless, auto makers gradually caved in and developed the Gumby restraint systems with which we are now blessed – or cursed, depending on your perspective. Personally, I consider this a giant step backwards, but the reasoning presumably was that half-assed restraints that 70% of the motoring public would actually wear were preferable to really good restraints that most wouldn't. Nevertheless, while the current crop of Gumby belts simply won't do on the track, I suppose their effectiveness has essentially become a non-issue on the street, since cars now cocoon their occupants with all manner of "passive restraints" whenever fools crash into something (and/or SOMEONE) because they're too busy talking or texting on their personal communication devices to be bothered with actually driving their vehicles. This, of course, greatly improves the likelihood that those same morons will live to crash another day, which is completely contrary to the dynamics of "Natural Selection." Not only are stupid people breeding, they're now being preserved so they may continue to breed long after they should have done the rest of us the courtesy of removing themselves from the gene pool. Where, oh where, is good old Charlie Darwin when we really need him? Dead, of course, but undoubtedly spinning in his grave. Speaking of good old Charles, did you know that his paternal granddaddy, Erasmus Darwin, was the individual who introduced the concept that later became known as Ackermann steering geometry? Well he was. Grandpa Darwin debuted this steering geometry in his paper of 1758 entitled "Erasmus Darwin's improved design for steering carriages," but the design wasn't patented until 1817 by Rudolph Ackermann, and so is known today as "Ackermann" rather than "Darwin" steering geometry. True story. In any event, ever since finally being properly secured once again by a good restraint system, I can barely tolerate the Cobra's OEM belt, so I rarely wear it. Hillie still uses the factory passenger belt because she prefers the Gumby design. Hmm. I'm beginning to think I should have just left the OEM belts out when I installed the Schroth harnesses.
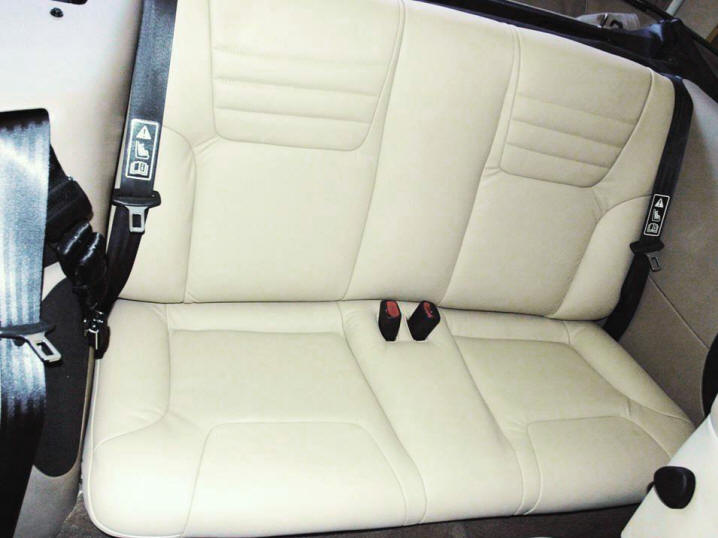
Matching Rear Seat UpholsteryI had Auto Spa, a local shop that had performed interior work for me in our other vehicles, cover the back seat with Recaro leather and custom stitching to match the front chairs. You can see the finished seat below.
NOTE: I learned the hard way that Recaro beige leather is a very difficult material to match with respect to both color and grain. Initially, I had Auto Spa re-cover the back seat with some leather obtained from a local distributor. However, it just didn't match quite right, even though the material in the sample book had appeared to be nearly identical. I suppose that serves me right for trying to get away cheap. After the initial miscue, I had Auto Spa obtain a couple genuine Recaro hides and recover the seat again. The Recaro material perfectly matches the front seats. Imagine that.
Seat Wiring ReduxWhen I first installed my Recaros, I had succeeded in convincing myself that I could rely entirely on cognitive vigilance to avoid inadvertently leaving the seats' bun warmers and/or fans engaged whenever I walked away from the Cobra. In early 2010, I became acutely aware that I needed to rethink this proposition. A pair of closely spaced missteps completely drained Taz's battery on two separate occasions, forcing a premature battery replacement and making it painfully obvious that I needed to remove my imperfect memory from the equation. Toward that end, I decided to introduce relays into the previously installed seat circuitry, rather than attempting to track down switched power circuits with adequate current capacities that I could run to the seats. The new relays completely removed the possibility of human error without necessitating a great deal of rewiring. In fact, only the driver side harness required modification, because the power feeds for both seats emerge on the left before the passenger seat circuit continues over to the chair on the right. In the photo below, you can see the way this harness looked after the relay sockets had been grafted in.
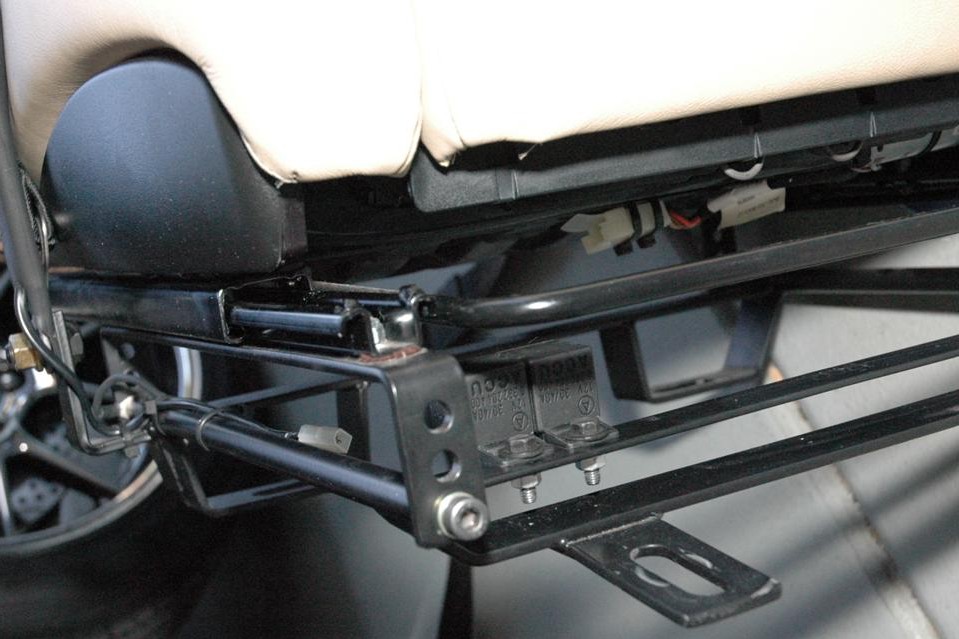
I laid the harness out this manner because I had determined that the best mounting location for the relays, themselves, would be on the front crossbar of the driver's seat base. There, they could be out of sight and out of harm's way, yet still be readily accessible in the event they ever needed replacement. The shot below shows the relays mounted to the base. All that remained to be done was to bolt the seat back into the car and connect the plugs.
Installing this relay circuitry, has certainly lifted a weight from my shoulders. I no longer need to ensure that every seat switch is off before putting Taz to bed, because there is no longer any power being supplied to the seats unless the ignition switch is in the ACC or RUN position. Better living through ingenuity. I like that.
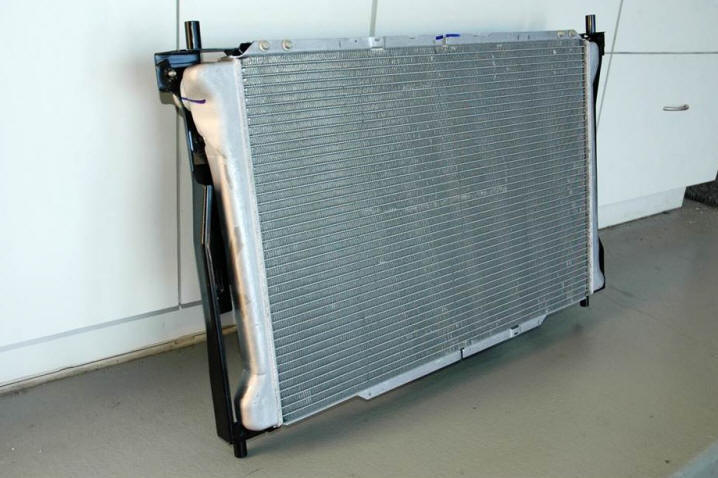
Ford Racing Aluminum Radiator
I probably could have repaired my OEM radiator with some epoxy after it developed a crack just below the upper hose fitting on the passenger side side tank, but who's to say how long the repair would have held? Besides, I'm not a huge fan of plastics, so I upgraded the radiator with a Ford Racing Performance Parts unit. This is the M8005-C03 part, which is apparently now out of production for some mysterious reason. That means you're going to need to find a dealer somewhere who still has one of these in stock if you'd like to pick up one for yourself, but don't get your expectations up. I scoured the Internet for three full days in the spring of 2011 before I found at a Florida shop. I bought the last one available there, and I genuinely doubt there are any more new examples remaining anywhere in captivity by now.
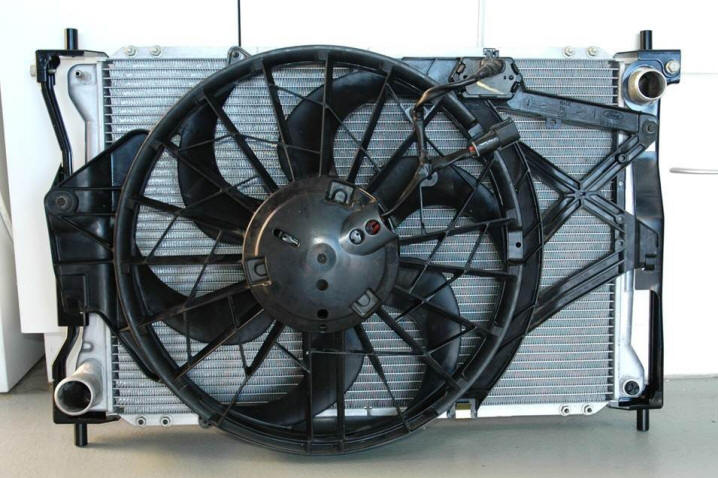
In addition to being constructed of better materials, the new tank boasts a larger coolant capacity. The nice thing about this particular part is that it's a direct, drop-in replacement that still provides a nice boost in cooling efficiency over the OEM part. (Not that I ever had any cooling issues with the factory radiator.) The OEM fan transferred directly over to the new unit, and the assembly slipped right into the spot where the original radiator had been. No relocation or modification of preexisting equipment required. Here's a shot of the new assembly ready to drop into the car.
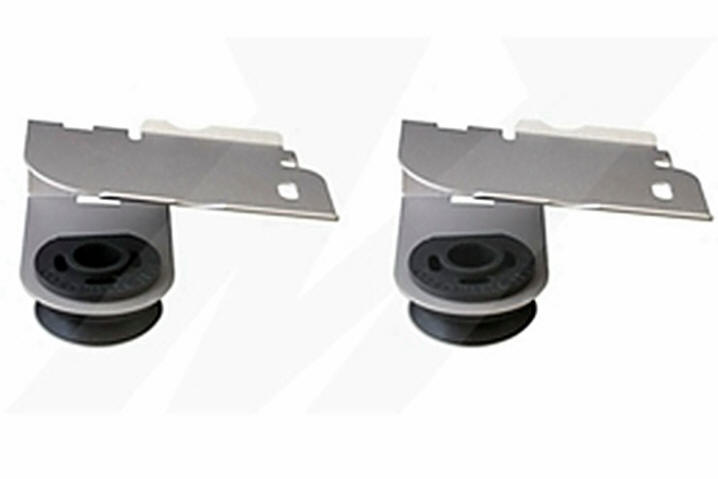
As you can see in the photo above, except for its mounting brackets, which are sheet metal, the Ford Racing radiator is all aluminum, including its side tanks. No plastic was used in its construction. The unit also boasts a two-row core, rather than the single row design of the OEM part. The 2-row design of the new unit wasn't quite the big attraction for me that it might have been if I had ever experienced any cooling issues with the original radiator. I hadn't, so it wasn't. Having read numerous accounts of aftermarket radiators developing stress cracks, I decided to buy myself a little insurance, so I installed a pair of more compliant Mishimoto upper radiator stays along with my new radiator assembly. In addition to their rubber grommets being much more compliant than the OEM grommets, the Mishimoto aluminum brackets are much more flexible than the steel brackets they replaced.
These stays have helped prevent fatigue cracks at the solder joints by minimizing radiator flexion. The above is a stock photo is from the Mishimoto website. Since the Ford Racing radiator's mounting brackets are black, I gave my new stays a couple coats of black paint prior to installing them, but I didn't bother to photograph them afterward.
Invisible Urethane Mask
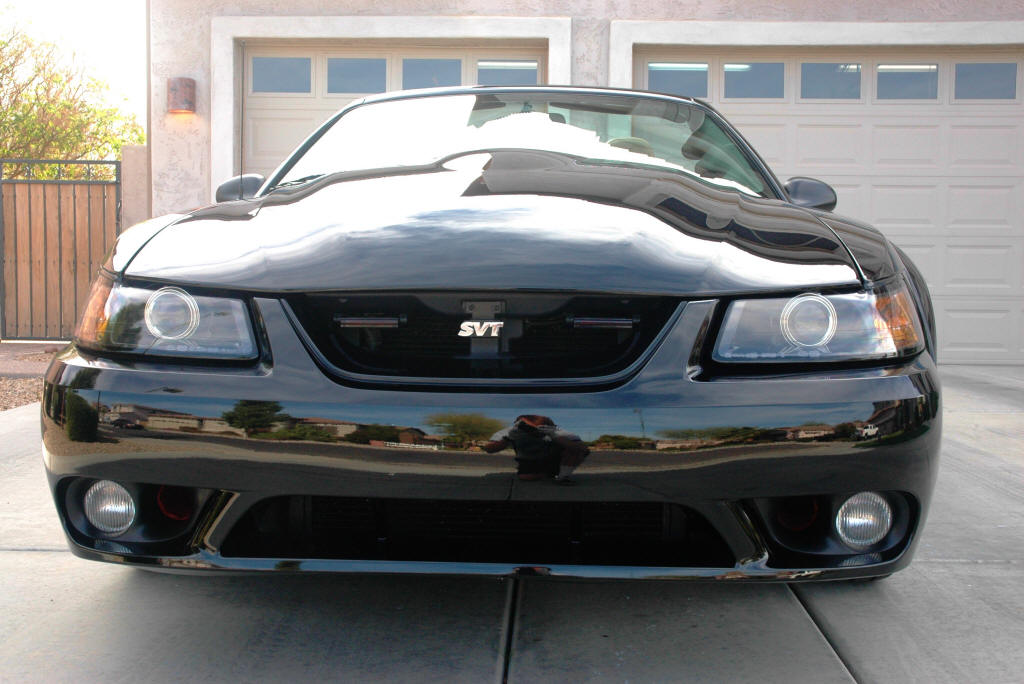
I was never particularly fond of hiding Taz's front end behind a vinyl mask most of the time. However, I was even less fond of chipped paint. I suppose front end paint chips are a problem everywhere, but the bits of granite littering the roads around here are particularly lethal to automotive finishes because of their jagged edges. My old Colgan mask had served me well for several years, keeping the Cobra's front end looking pristine - as I was able to verify on the rare occasions when I could actually see the front end, but I eventually grew to resent having to drive around in a car that resembled the McDonald's Hamburglar. In November of 2011, I finally decided to revisit the possibility of a clear polyurethane mask for Taz. I had previously looked into invisible masks and was intrigued by them, so I began investigating in earnest. I soon discovered that the new Xpel Ultimate film was widely considered the best on the market because of its ability to repair itself, as well as for its glossy smooth clearcoat finish. If you’re curious about this product, you can find videos on YouTube that demonstrate the film's self-healing capability in action, as well as its ability to shed all sorts of chemicals, including spray paint, lacquer thinner, and DOT4 brake fluid. It’s really amazing stuff! My investigation further revealed that one of the sponsors of our local Mustang forum was a company named SmartShield, which is an authorized installer for both Xpel and 3M films. After I had contacted the company and obtained an estimate, I told Santa Hillie that the loot for the film would make a swell 2011 Christmas present. Hillie came through, and I was able to have an Xpel Ultimate invisible mask installed right after the holidays. SmartShield installed full coverage for the car's nose and extended coverage (24”) on the hood and fenders. Mike, my installer, even cheated the pattern enough to allow for a 5" arc along the back edge of the hood/fender pieces, which looks really good. I had intended to also have film applied to the A-pillars and windshield header, but reconsidered when Mike advised against it. He told me that ending the film on the radius of an A-pillar was a bad idea, because the edges always lift when you do that. The photo below shows Taz's front end with the invisible mask installed. You can't see it, because it's ... well, invisible.
The mask really is fantastic! It absolutely cannot be seen at all from the front. If you’re looking from behind, you can see a very faint line along the film’s trailing edge across the hood and down the fenders. But all you’re seeing is the light reflecting off the back edge of the film. No way around that unless you want to have the entire panel covered, which some rich guys do. I’m not one of those guys, and occasionally seeing a faint line under certain conditions doesn’t bother me a bit. Refer to the photo below for a visual of what I'm talking about.
Although I no longer feel compelled to use my old vinyl mask for local drives, which account for more than 90% of my wheel time, I continue to use it for road trips to provide an additional layer of protection against highway debris. Even though Xpel has demonstrated that this film protects painted surfaces against high speed impacts up to 120 mph, I figure a little extra protection certainly isn't going to hurt.
|